-
Importing Data
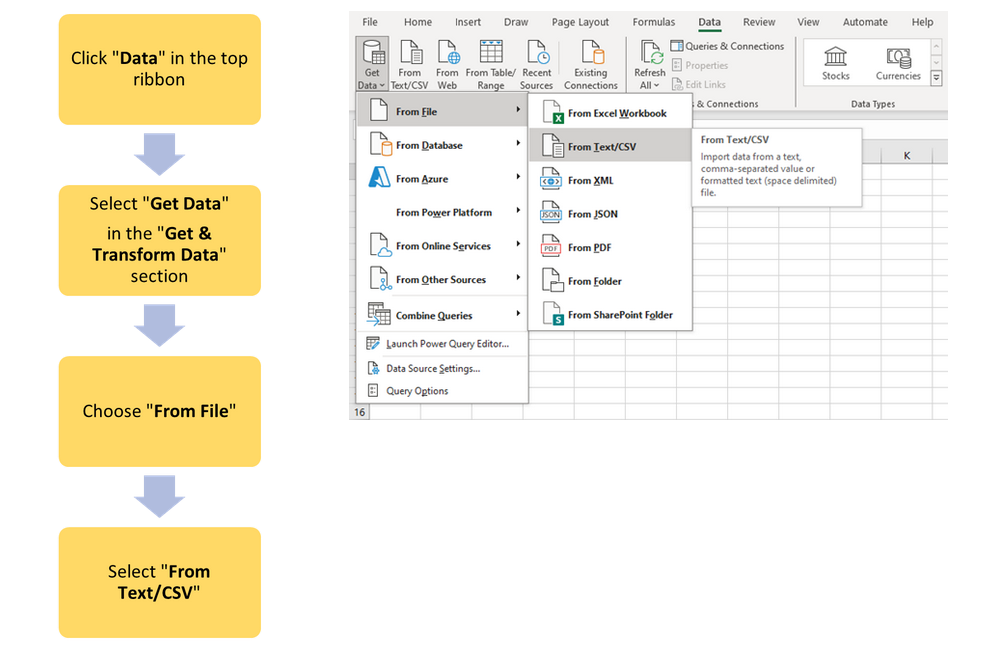
Text Files
Text files (usually saved with the filename extension .txt or .csv) are data treasure chests. Let’s unlock them in Excel!
This skill is crucial when you’re working with data from databases, surveys, or machine logs. Ready to become a text-to-table wizard?
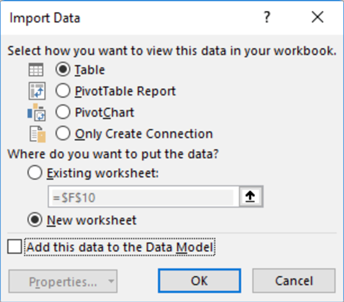
After selecting your file and clicking on Load, make sure you put the data in the correct worksheet.
If you want to add the data into a current worksheet, make sure to select “Existing Worksheet”.
This ensures your data lands exactly where you need it, keeping everything organised and easy to find.

See Also: Import data from a Web page in Excel
You may sometimes have to use Data from online sources.
In these cases, you can watch the video below for a demonstration on how to import such data into your workbook.
-
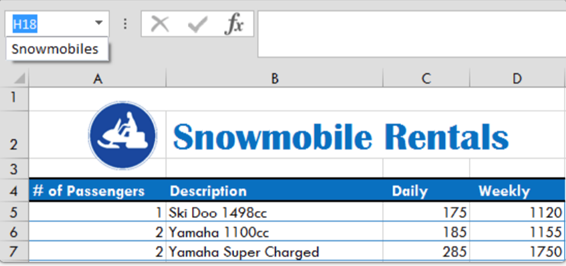
Searching within your Workbook
Excel is like a treasure map when you know how to search! On the Home tab, you will see a tool called “Find and Select”. This lets you quickly locate specific text, or replace text throughout your workbook.

Find: Use this to locate specific words, numbers, or phrases.
Replace: Handy for updating repetitive data—like changing all instances of “Pending” to “Completed”.
Navigate to Named Cells, Ranges, or Workbooks
Once names are assigned to key cells, cell ranges, and other workbook elements (such as tables and charts), you can navigate to these specific locations from anywhere in the workbook with ease.
Use the Name Box, located to the left of the Formula Bar, to type or select the name you need. It’s like having a GPS for your data, helping you jump to exactly where you need to be without scrolling endlessly.
-
Format Worksheets and Workbooks
Just like a craftsman fine-tunes their tools, you’ll want to perfect your worksheets and workbooks to make them look professional and easy to read. Let’s dive into some essential formatting techniques:
Change your Page Setup
Getting your page setup right is crucial for printing and presenting your data. Here’s how to tweak it to perfection:
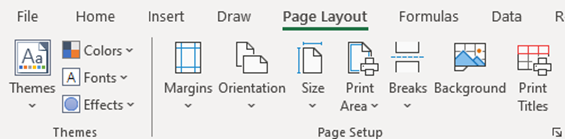
- Page Layout Tab: Click on this tab to find your page setup tools.
- Margins, Orientation, Size: Adjust these to fit your content neatly onto the page.
- Margins: Set the space around your content.
- Orientation: Choose between Portrait (tall) and Landscape (wide).
- Size: Select the paper size you’ll be printing on.
- Print Area: Define which parts of your sheet should be printed, ensuring only the important data gets on paper.
Adjust Row Height and Column Width
Making sure your rows and columns fit your data perfectly is key to a clean, readable spreadsheet:
- Home Tab: Head here for quick access.
- Format Menu: Look in the Cells group.
- Row Height: Adjust to ensure your data isn’t cut off.
- Column Width: Make columns wider or narrower to fit your content snugly.
- AutoFit: Use this magic button to automatically adjust the row height or column width to fit the largest item in the row or column.
Customise Headers and Footers
Adding headers and footers can give your worksheets a polished, professional look:
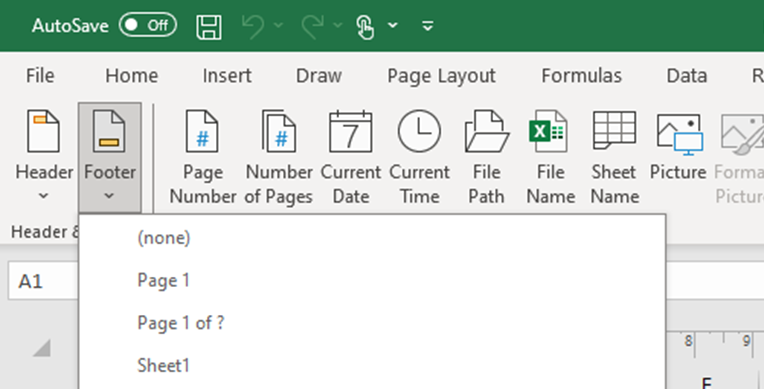
- Insert Tab: This is where you’ll find the Header & Footer tools.
- Header & Footer: Click to open the design tools.
- Footer Group: Expand this section to see different formats.
- Add Page Number: Select the option to insert a page number in the footer.
Tip:
After following these steps, you might end up seeing your Excel file in a weird different layout! To see it normally, head to the View Tab and select the Normal Workbook View type. This will bring you back to the familiar Excel view.
-
Customise Options and Views
Excel isn’t just about entering data; it’s about making your workspace comfortable and efficient. Customising options and views can transform your Excel experience, making it more tailored to your needs.
Freeze Worksheet Rows and Columns
Have you ever scrolled down a large dataset and lost track of your headers? Freezing rows and columns keeps important information in view as you navigate through your worksheet.
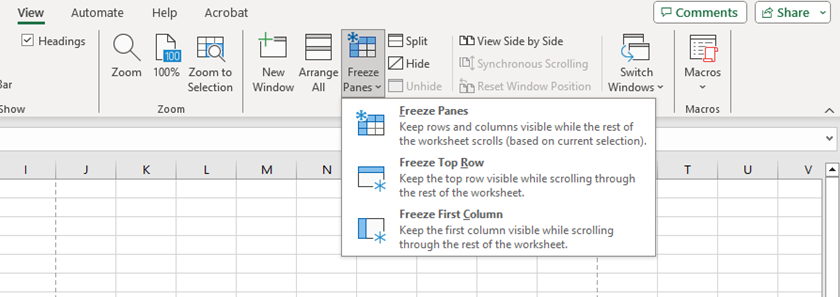
- View Tab: Go here to find the Freeze Panes options.
- Freeze Panes: This locks specific rows and columns in place.
- Freeze Top Row: Keeps the top row visible while you scroll down.
- Freeze First Column: Keeps the first column visible as you scroll across.
- Freeze Panes: Select this option to freeze rows and columns based on your current selection.
Modify Built-in Workbook Properties
Customising workbook properties can make managing and searching for files easier. These properties include details like the author, title, and keywords associated with your workbook.
- File Tab: Click here and then select Info to access properties.
- Properties Section: Here you can see and edit various details.
- Title, Author, Keywords: Adding these makes your workbook more searchable.
- Advanced Properties: For more detailed options, click on Advanced Properties at the top right.

-
Preparing Presentations to Collaborate and Distribute
Ready to share your Excel masterpieces with others?
Whether you’re presenting to a team or distributing reports, proper preparation ensures your work is clear, professional, and easy to understand.
Set a Print Area
Define exactly what you want to print to avoid unnecessary pages and ensure your output is just right:
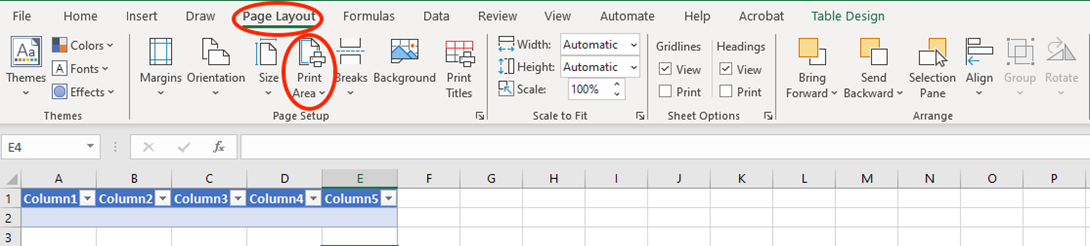
- Page Layout Tab: Navigate here to find the Print Area options.
- Print Area: Select the cells you want to print, then click “Set Print Area”.
- Clear Print Area: Reset if you need to redefine the area.
Save and Export Workbooks as Different Types of Files
Sharing your workbook with different audiences might require various formats. Excel makes it easy to save and export your work in formats like PDF, CSV, and more.
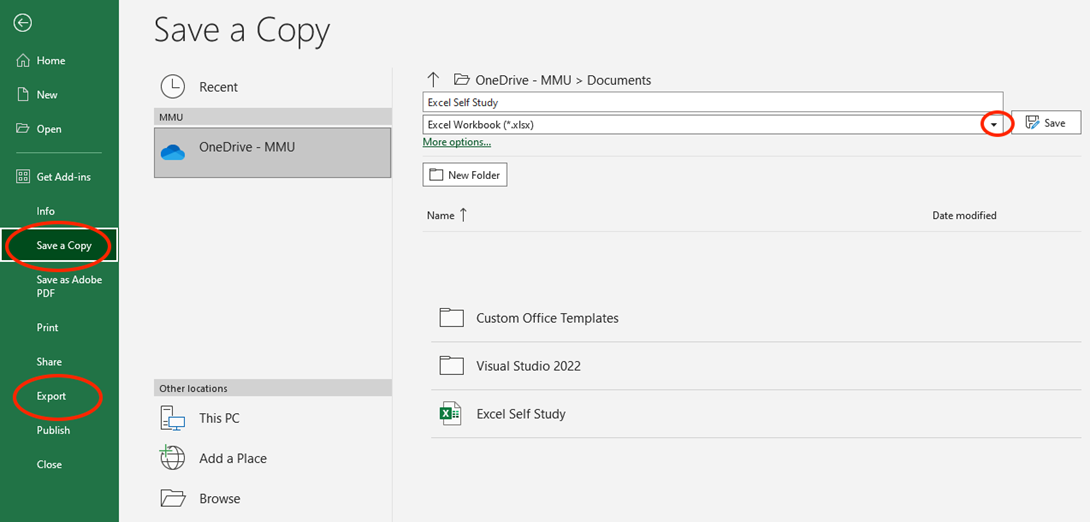
- File Tab: Go to Save a Copy or Export.
- Save As: Choose from a variety of formats such as Excel Workbook (.xlsx), PDF, CSV, and others by clicking on the expanding sign on.
- Export: Use this for more specific options, like creating a PDF or an Excel 97-2003 workbook for compatibility with older software.
Configure Print Settings
Fine-tuning print settings ensures your document looks perfect on paper.
- File Tab: Click on Print to access print settings.
- Settings: Adjust key options to match your needs.
- Print Active Sheets: Choose to print the entire workbook, only the current sheet, or a selection.
- Print Selection: Print only a specific selection of cells.
- Page Orientation: Select Portrait or Landscape.
- Scaling: Fit your sheet to one page wide or tall to avoid unnecessary breaks.
Inspect the Workbook and Correct Issues
Before sharing your workbook, it’s crucial to check for errors, hidden properties, or sensitive information.
- File Tab: Select Info from the far-left ribbon, then click on “Check for Issues”.
- Inspect Document: This tool helps identify potential issues.
- Document Properties and Personal Information: Ensure no hidden metadata is shared.
- Hidden Rows and Columns: Check for any hidden data that might need revealing or deleting.
- Compatibility Checker: Verify your workbook’s compatibility with earlier versions of Excel.
-
Try it Yourself
Well done on completing the first section of this Self Study Pack!
Now it’s time to get some practice . . .
Below is a file we have created for you. This is the spreadsheet you will be working in for this sprint.
Download: 1. Manage workbooks and worksheets
You will see one of the spreadsheets in the file is currently blank – don’t panic! This is intentional so you can practice importing data yourself. Completing these exercises will boost your confidence and efficiency, making you an Excel expert in no time.

Apply Your Thinking
Dive into the below tasks and become a pro at managing workbooks and worksheets.
- Import the spotify_songs.csv file into the “Songs” worksheet using the “Data” tab. Before proceeding with this task, you need to make sure you have downloaded the csv file in the green box below.
- Use the “Find and Select” feature to locate the song “Breathe” in the imported data.
- Modify the page setup of the “Songs” worksheet to landscape orientation and set the margins to “Narrow” to maximise the printable area.
- Add a header with the title “Spotify Songs Data” and a footer with the page number using the header and footer tools.
- Freeze the top row of your worksheet to keep the headers visible as you scroll down through the dataset.
- Modify the workbook properties by adding your name as the author and a brief description as the title.
- Display the formulas used in the worksheet instead of the results for a quick review of your calculations.
- Select the range of cells containing the song data to set as the print area. Use the range A1 to E21 as your print area, ensuring that all relevant information is included for printing.
- Save the workbook as a PDF and export it to ensure it looks professional for sharing.
- Inspect the workbook for issues, such as hidden rows/columns and personal information, and correct any identified problems.
Don’t worry if you get stuck – the solutions are on a separate worksheet below just in case.
